Part IB Paper 8 - Photo Editing
Colour Examples
Nick Kingsbury - April 2008.
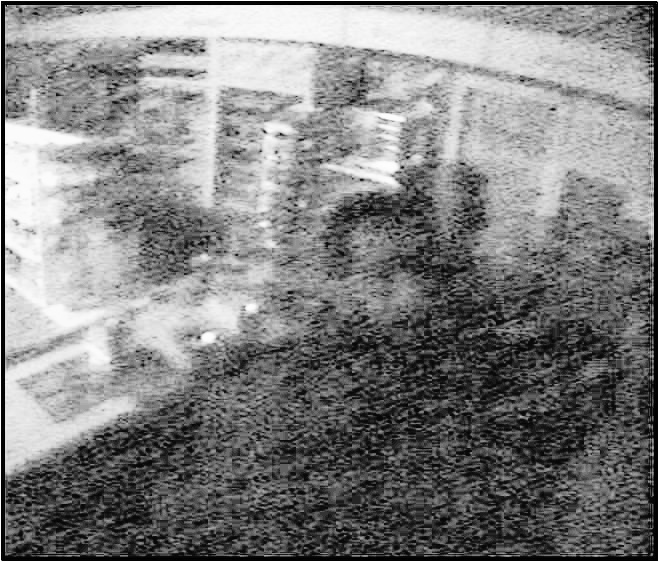
Shop surveillance image (poor quality)
This shows a typical low-quality video surveillance frame (shop.jpg). Suppose we wish to try to recognise the customer's face:
This is the image cropped to [xmin xmax ymin ymax] = [281 408 61 188], a size of 128 x 128 pixels (shop_crop.jpg):
This is the cropped image resized by x2 (shop_crop_x2.jpg):
This is the resized image with Colour Shift enhancement, HSV mode – Sat x2; Value x1.4, -0.2 (shop_col_enh.jpg):

This is the colour enhanced image with Filter enhancement, Lowpass breadth = 1, iter=2; Highpass breadth = 10, iter = 1 (shop_col_enh_filt.jpg):

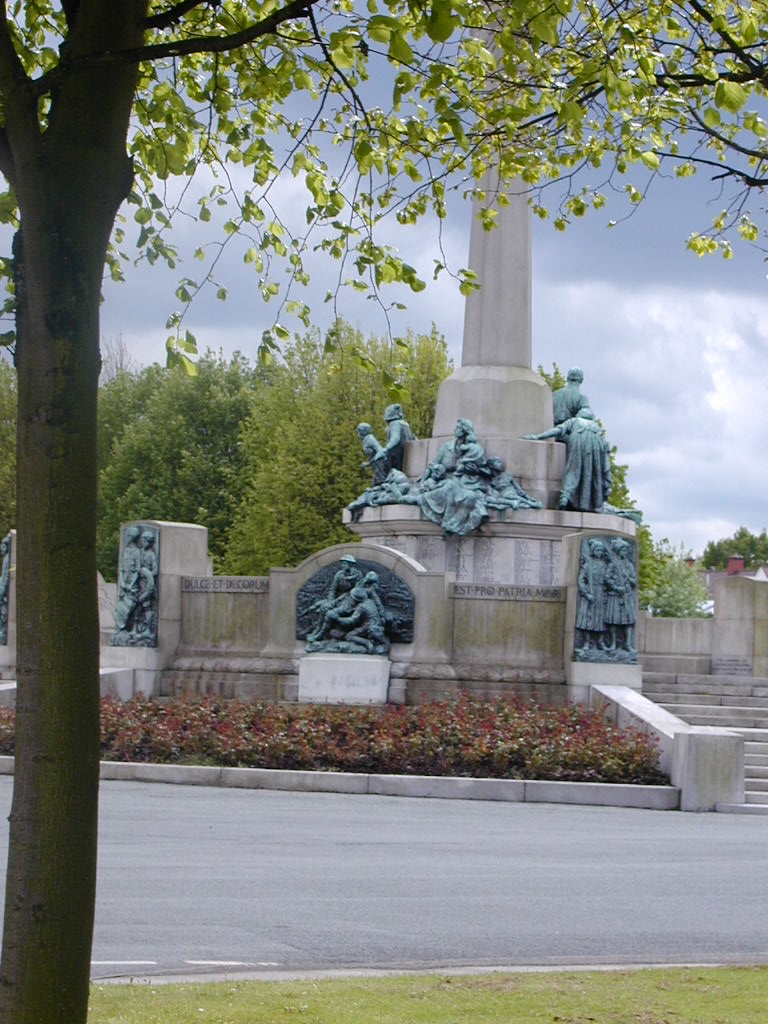
Memorial Image (camera not level)
This is an image where the camera was not level (memorial.jpg)l:
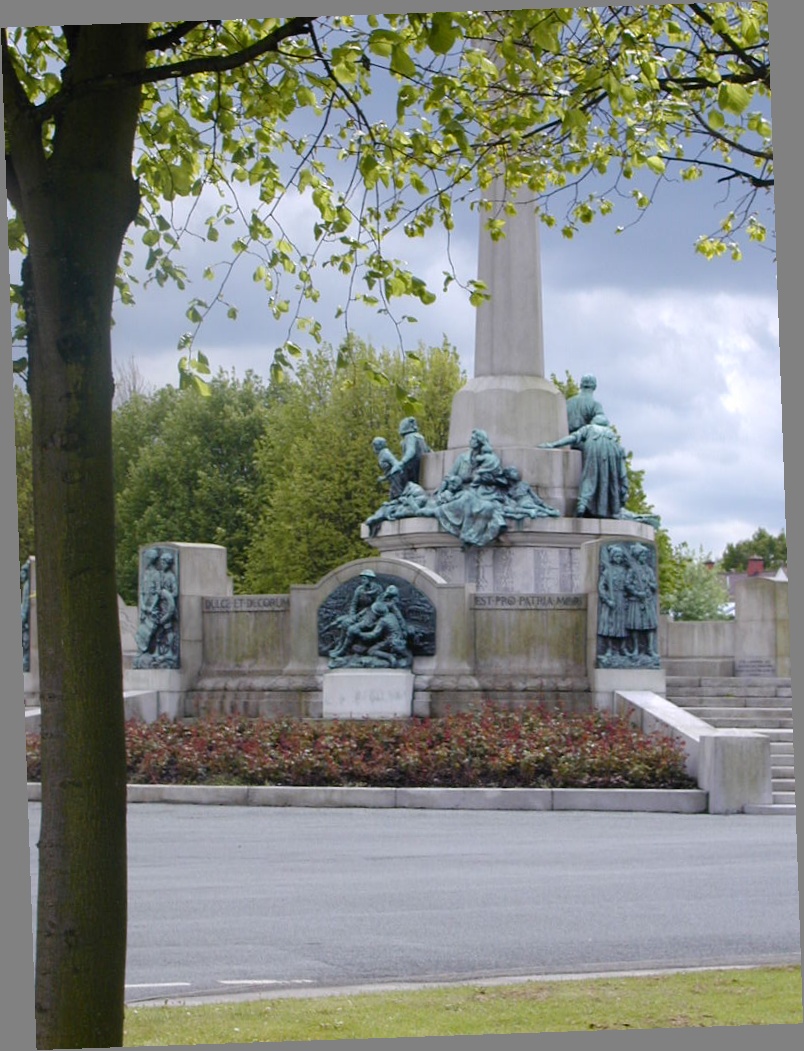
Here the image has been rotated by +2 degrees (memorial_rot.jpg):
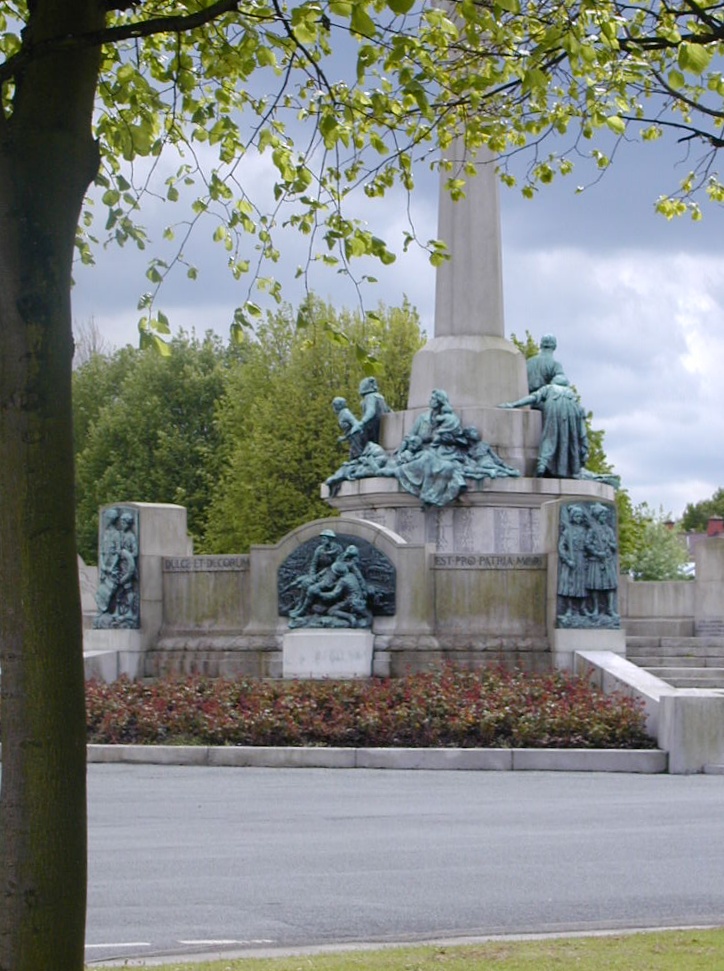
Here the image has been cropped by 40 pels from each edge [41 764 41 1011] to remove the grey triangles that were introduced by the rotation (memorial_rot.jpg):
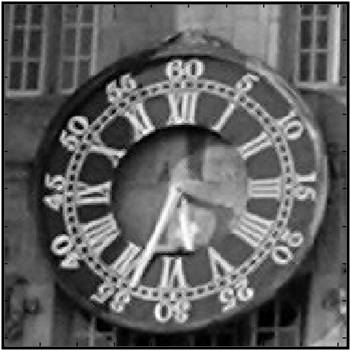
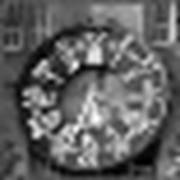
Clock Image with subsampling
Sometimes it is necessary to reduce the size of an image (for display as a thumbnail or to send it over a low-bandwidth channel perhaps). We must be careful to include the right amount of anti-aliasing filtering before we perform the downsampling:
Clock original (clock.jpg):
Clock, subsampled by a factor of 9 (= scaling by 0.1111):

Enlargement of the subsampled image
Clock, lowpass filtered using a Gaussian filter with breadth b = 3.5 (corresponding to a half-amplitude pulse width of 9 pixels):

Clock, lowpass filtered and subsampled by a factor of 9:

Comparison of enlarged subsampled images, with and without lowpass filtering. Note the improved legibility with anti-alias filtering (left):


Colour Representations:
RGB:
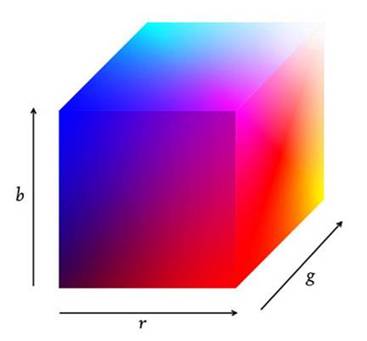
YUV also uses this cube, but projected onto different axes of Y = 0.3R + 0.6G + 0.1B (luminance), U = B-Y (blue-to-yellow difference), and V = R-Y (red-to-cyan difference).
HSV is Hue, Saturation and Value:
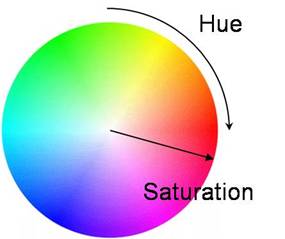
Value, V = max(R,G,B)
Saturation, S = {V – min(R,G,B)} / V
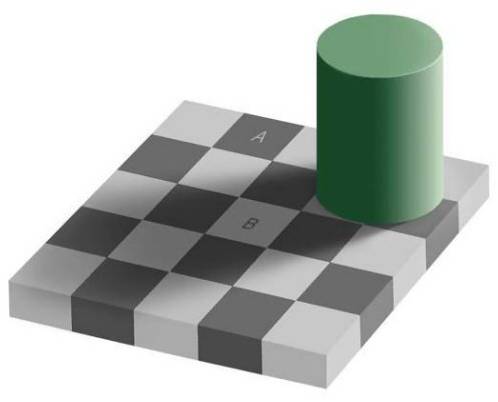
The human eye tends to be very insensitive to smooth spatial changes in brightness, so we can slowly change Y or V without much apparent image change.
We do not really notice the depth of shadow on the chess board or the shading on the cylinder.
Patches A and B have the same pixel intensity!
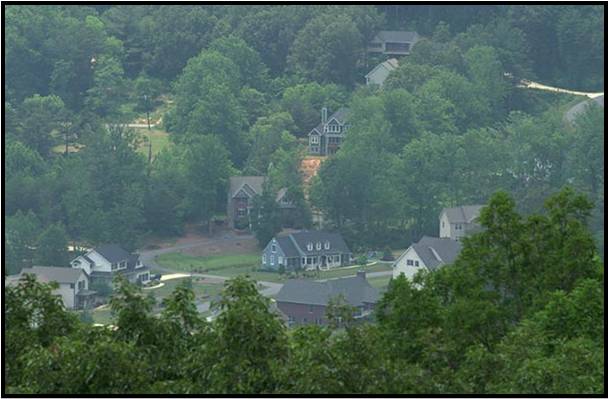
Village Image with haze
This image is affected by atmospheric haze, which we wish to remove (village.jpg):
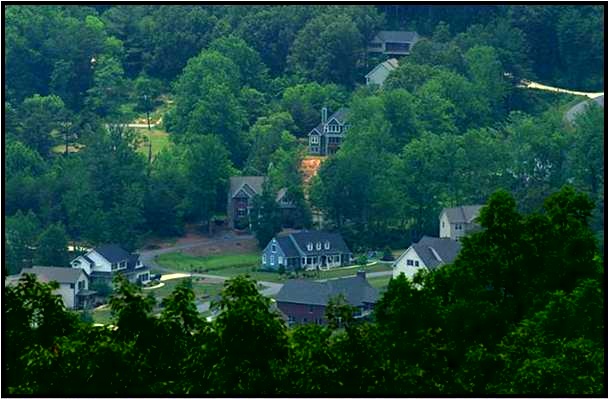
Here we use Colour Shift in YUV mode to subtract the grey of the haze and increase the colour saturation – Y = x1.6, -0.4; U = x2; V = x2 (village_col_enh.jpg):
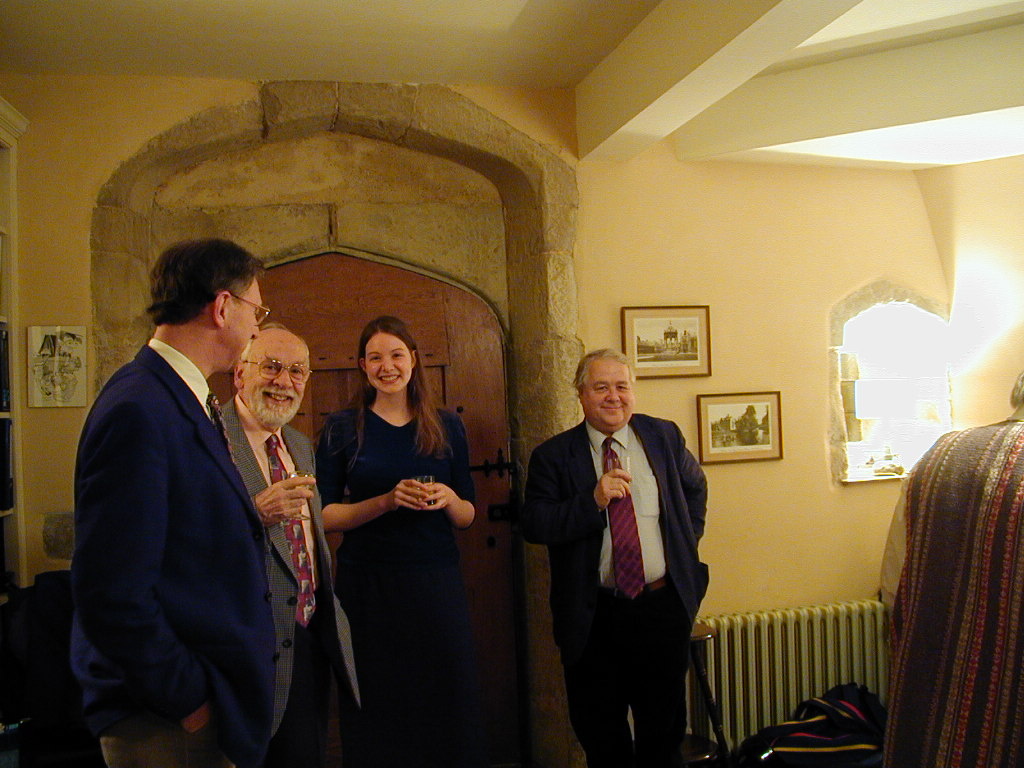
Party Image with tungsten lighting
This image was taken under tungsten light and is too yellow (party.jpg):
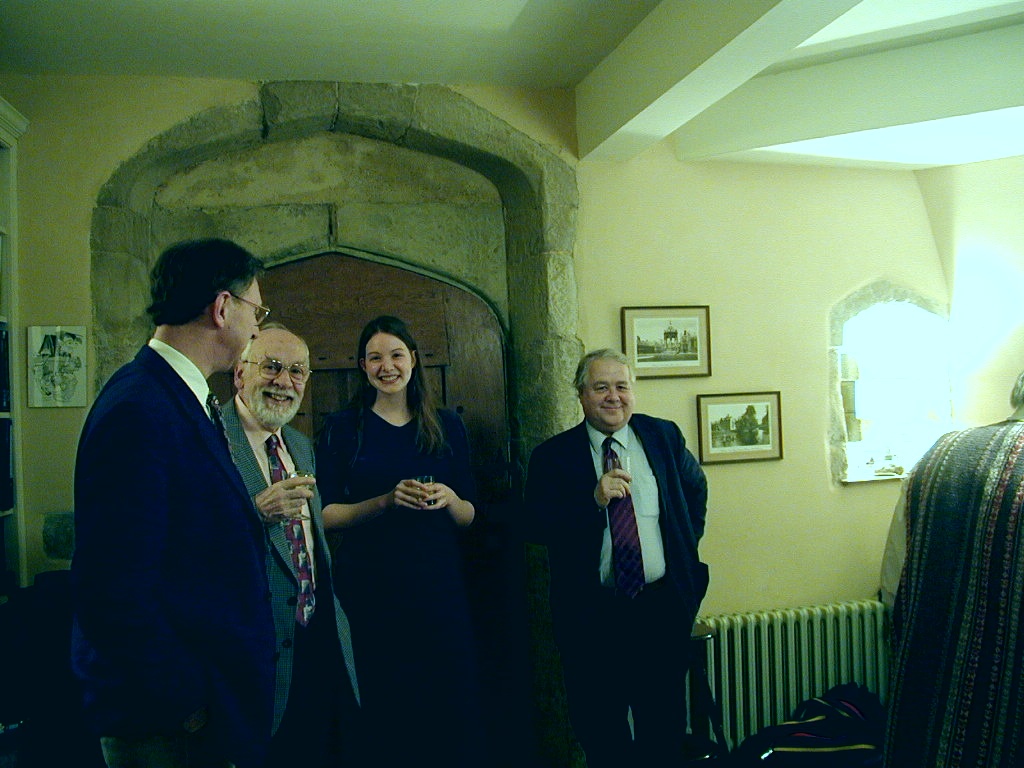
Colour is corrected by using Colour Shift in YUV mode with the following settings - Y = x1.2, -0.1; U = +0.05; V = -0.1 (party_col_corr.jpg):
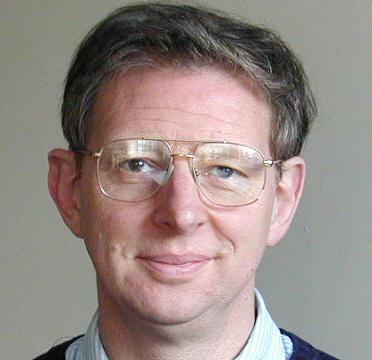
Face image with edge enhancement
This is photo of my face before and after highpass filtering (b = 2pels) to enhance edges:

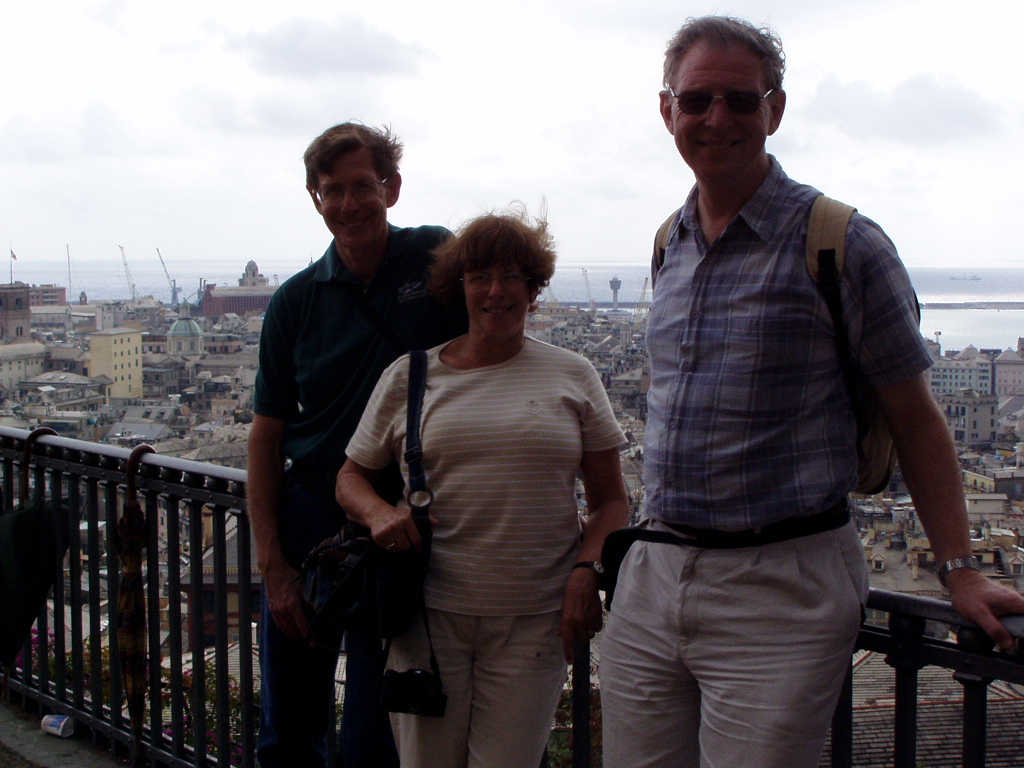
Genoa Image with poor foreground illumination
This image has a light background and so that the faces of the subjects are poorly lit and too dark (Genoa_view.jpg):
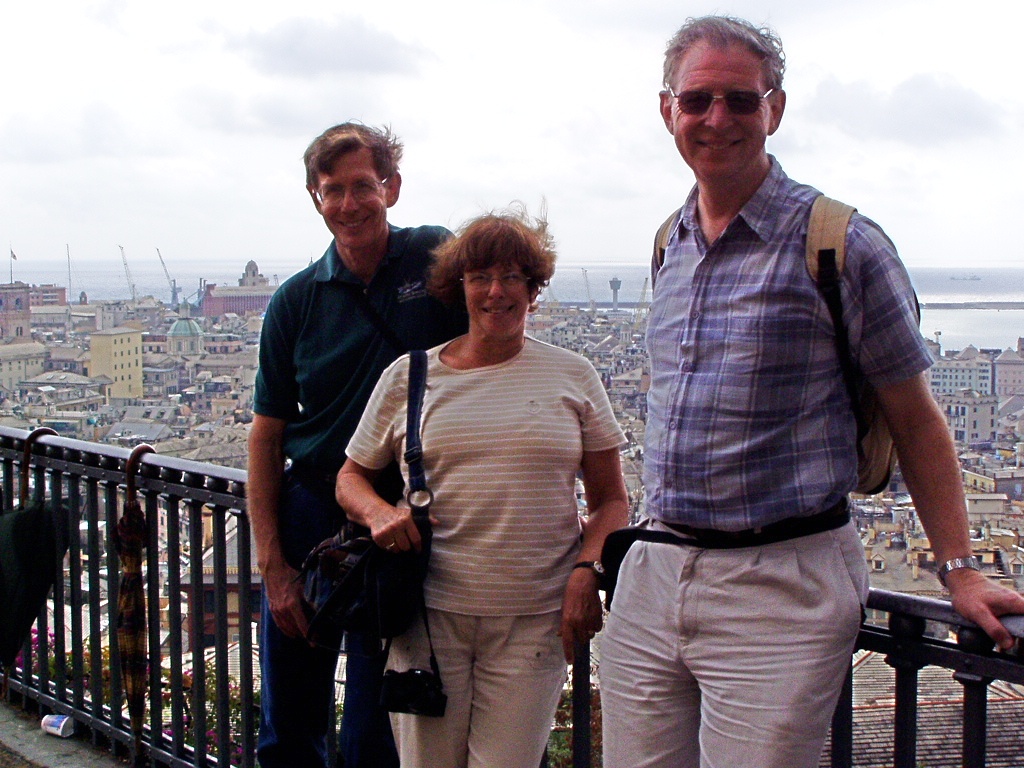
So we have corrected the shadows without significantly affecting the background parts by using Lighting Shift with Shadows = +0.25; Mid tones = +0.1 (Genoa_view_corr.jpg):
There is noise in the lightened skin tones, so we enhance the image using Enhance with Denoise threshold = Sharpen threshold = 10; 1 iter of Reduce Noise and 1 iter of Sharpen Edges (Genoa_view_enh.jpg):

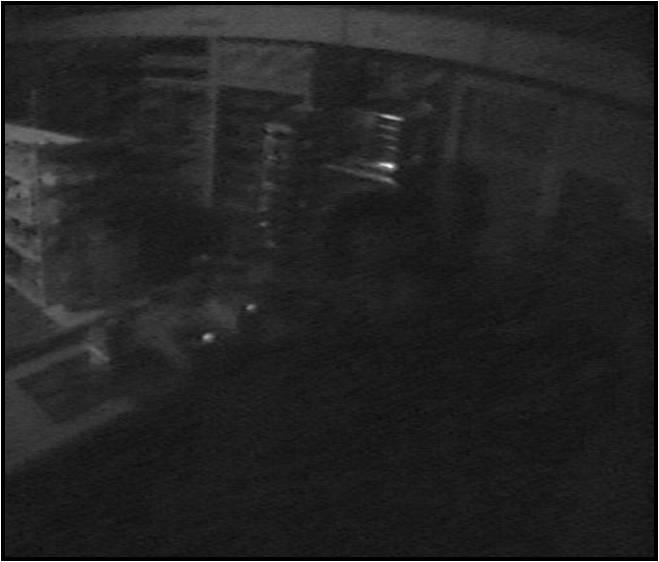
Very Low Light Image with enhancement:
This is an image that has very low foreground lighting (low_light3.jpg):
so we have passed it twice through the Lighting Shft function with Shadows = +0.25, and Mid tones = 0.1 (low_light3_lightx2.jpg):

An alternative is to use histogram equalisation but this is too non-linear and severe (low_light3_histeq.jpg):